
使用 Docker 快速搭建 Bitwarden 个人密码管理服务
目录
首先编辑 docker-compose 文件
| |
首先可以设置 SIGNUPS_ALLOWED=true 进行注册,然后再修改为 false,再次运行配置文件,这样就可以只有一个用户,防止其他人注册使用。
可以通过邮件邀请注册,也是通过 INVITATIONS_ALLOWED 是否为 true 决定的。
使用 Nginx 进行反代
| |
前往管理页面

这个页面输入 ADMIN_TOKEN 的值,进去之后,前往 Diagnostics 查看配置时间、反代是否有问题:
配置 NTP
在 Diagnostics 中,时间同步有误,需要在服务器上配置 NTP 来保持正确的时间同步

- 安装 NTP 服务
1sudo apt-get update && sudo apt-get install ntp - 重启 NTP 服务
1sudo service ntp restart - 现在前往 Diagnostics 页面再次检查,刷新页面之后依然有误,则重启这个 container,之后应该就是正常的了。
其余配置
配置 SMTP
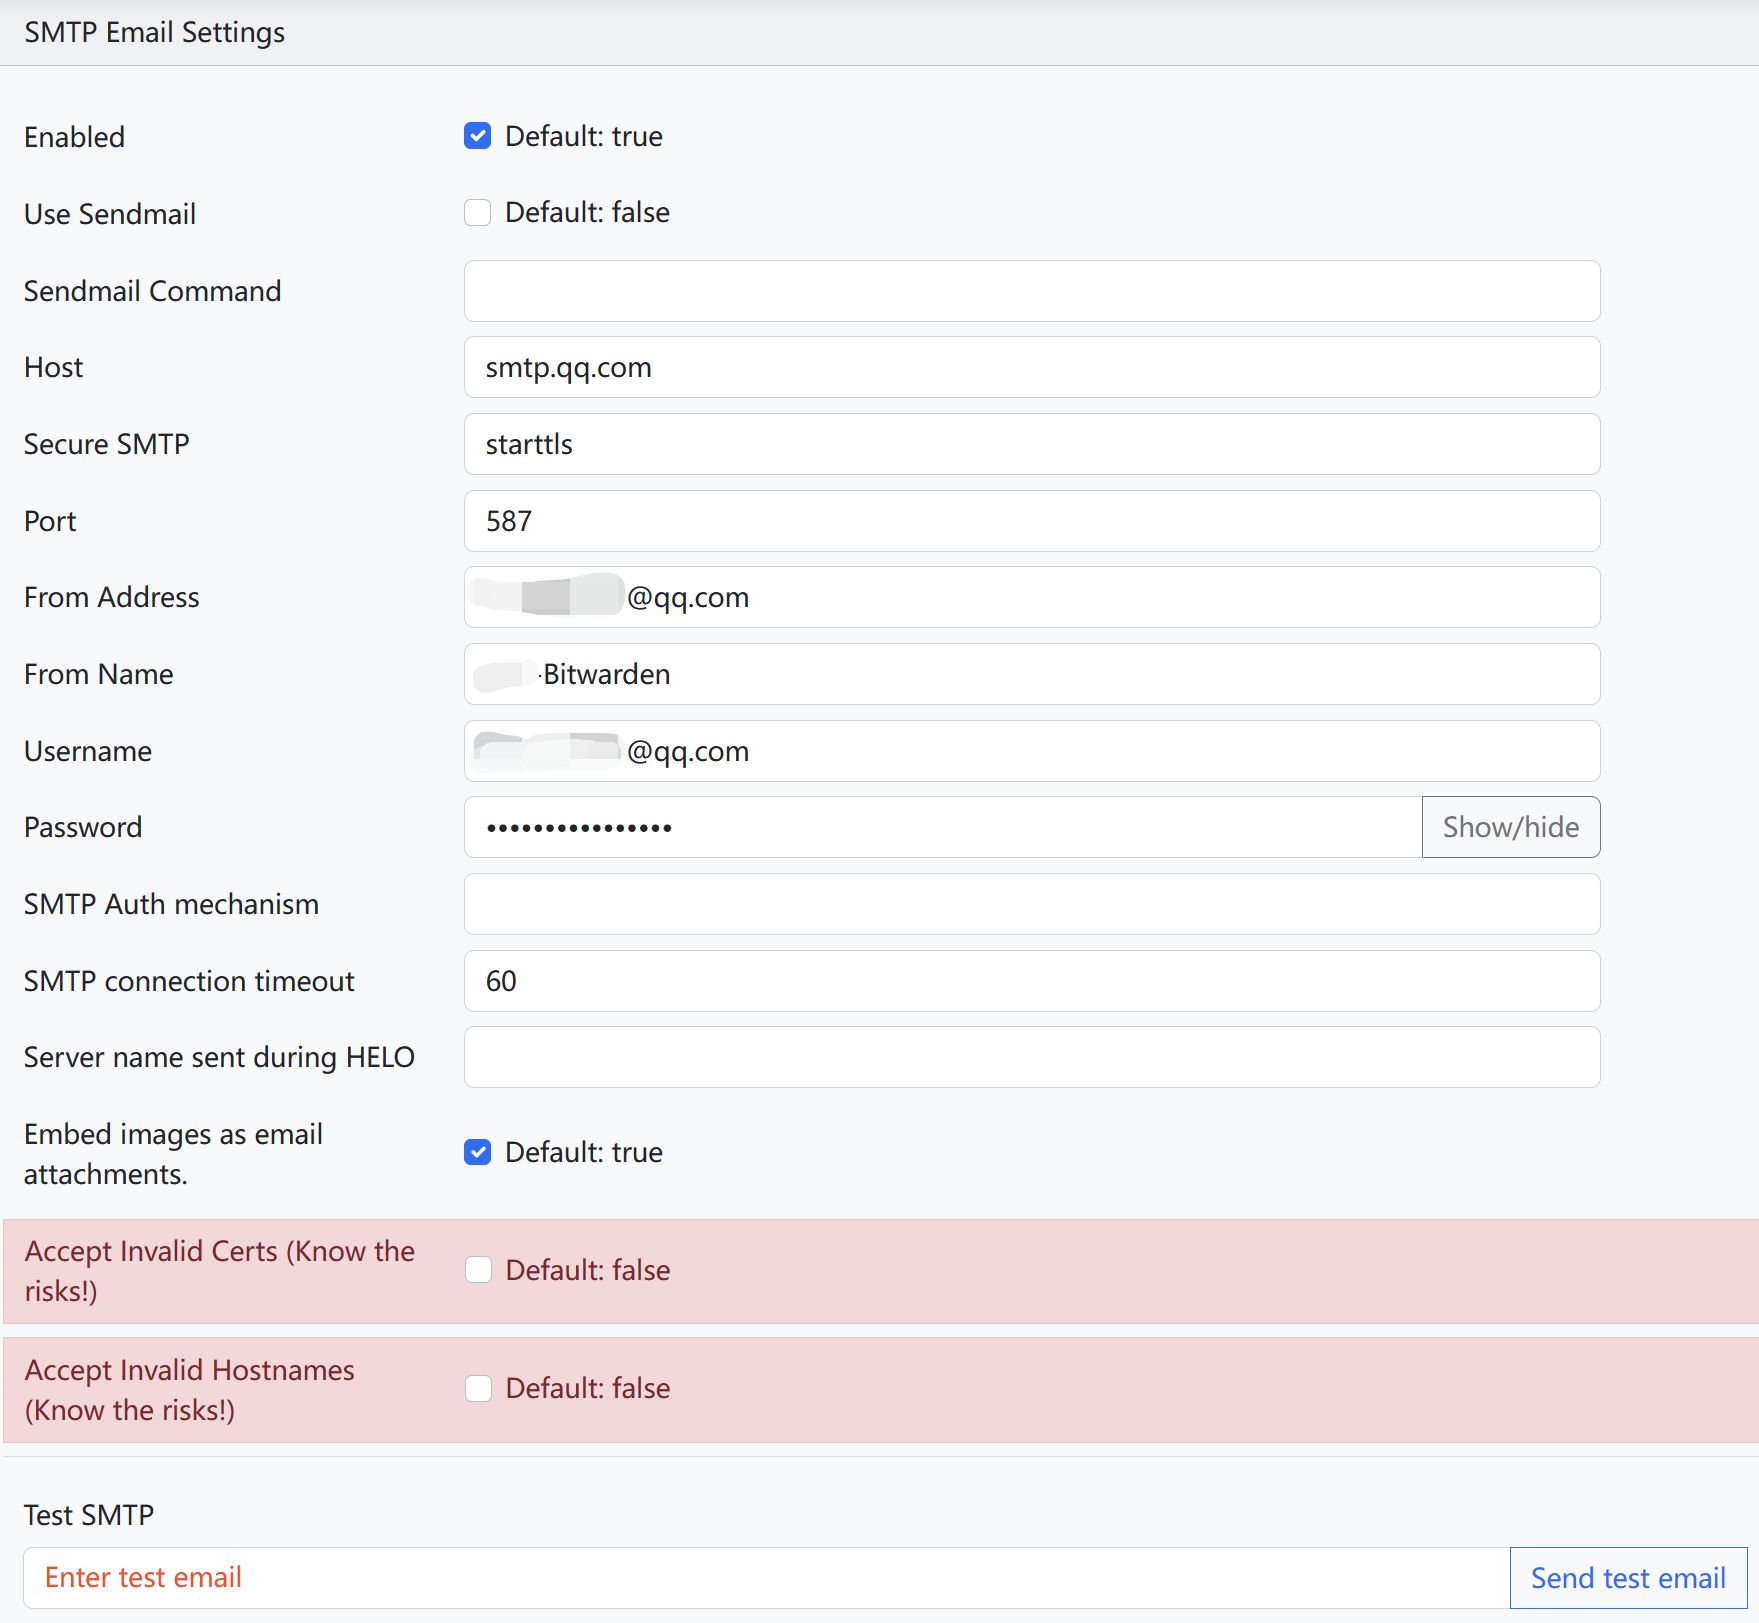
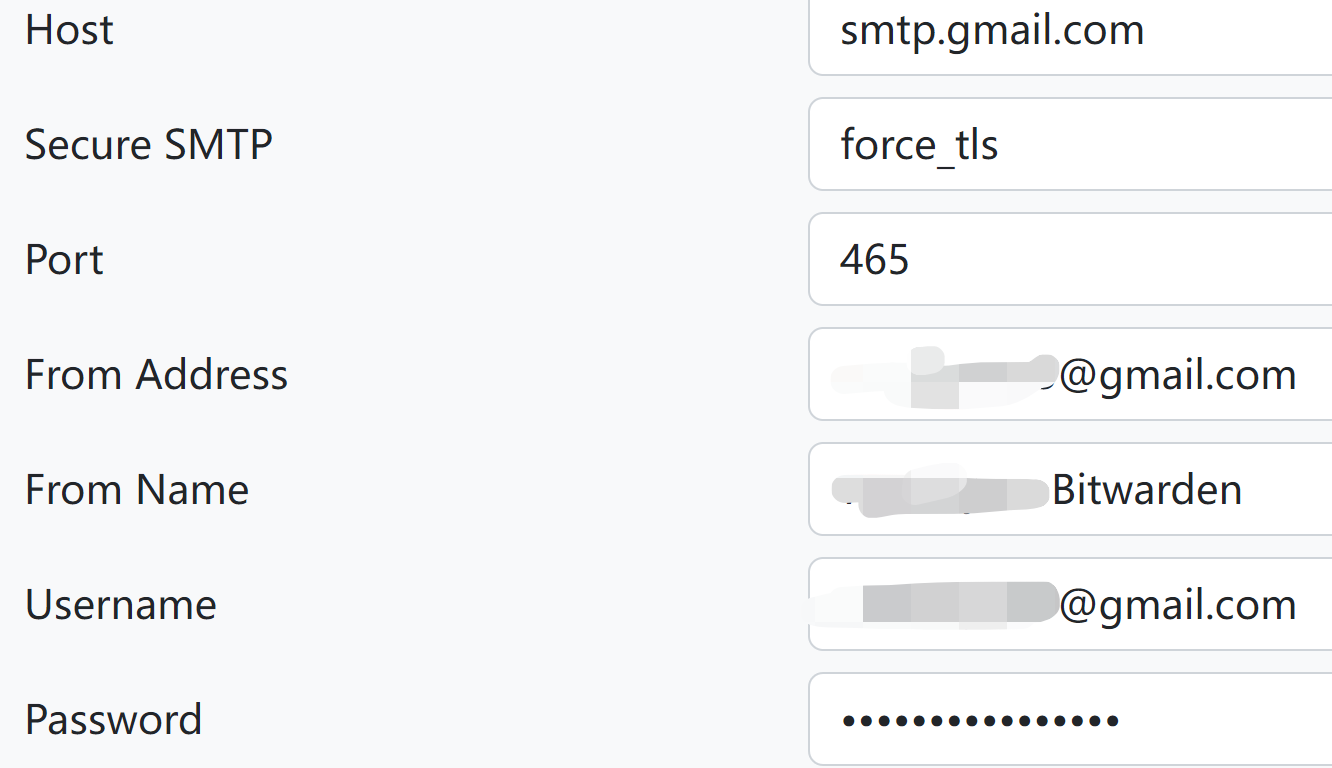
因为我搭建的这个服务器在国内,所以使用 QQ 邮箱比较稳定,国外优先使用 Gmail,具体的配置信息就如图所示,From Name 是发件人名字,可以自己个性化填写,Password 需要前往 QQ 邮箱获取 SMTP 的密钥而不是 QQ 密码。全部填写好了之后,先点击页面左下角的 Save 保存,然后再次点开设置,在 Test SMTP 中输入测试邮箱,如果提示下面这张图片的信息,那么表明你配置成功了。

当然在 Secure SMTP 中可以选择 force_tls,这个时候 Port 则需要填写 465。
如果选择 Gmail,那么这里的密码获取步骤:
- 转到您的 Google 帐户。
- 选择安全。
- 在“登录 Google”下,选择两步验证。
- 在页面底部,选择应用程序密码。
- 输入可帮助您记住将在何处使用应用密码的名称。
- 选择生成。
- 要输入应用程序密码,请按照屏幕上的说明进行操作。应用程序密码是在您的设备上生成的 16 个字符的代码。
- 选择完成。
打开 Email 2FA

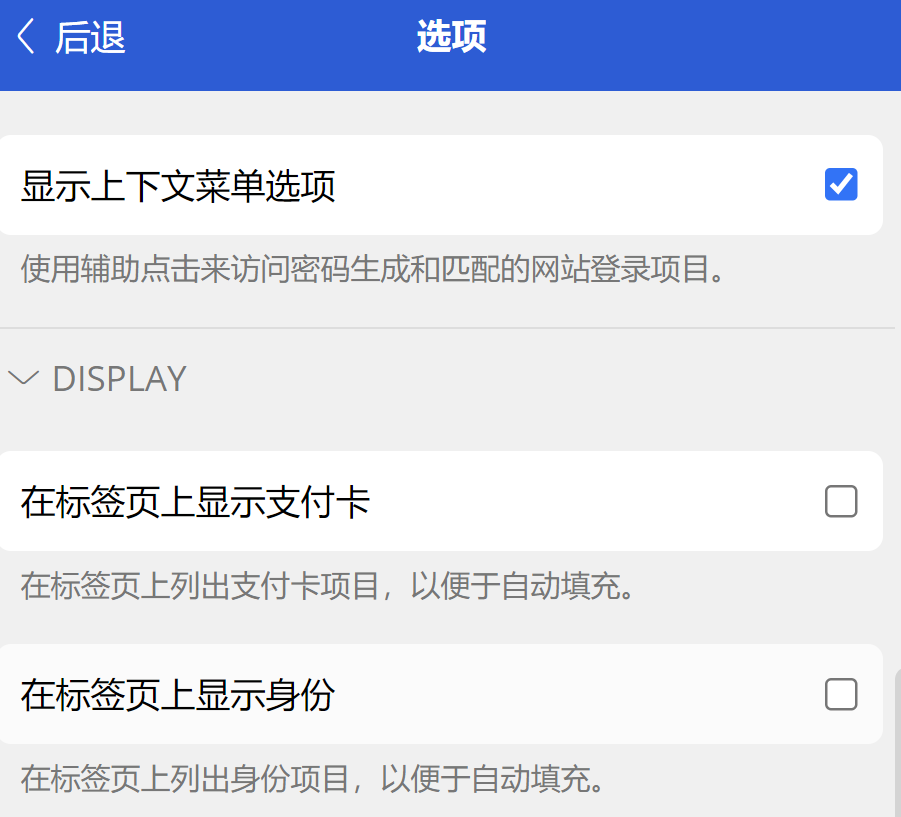
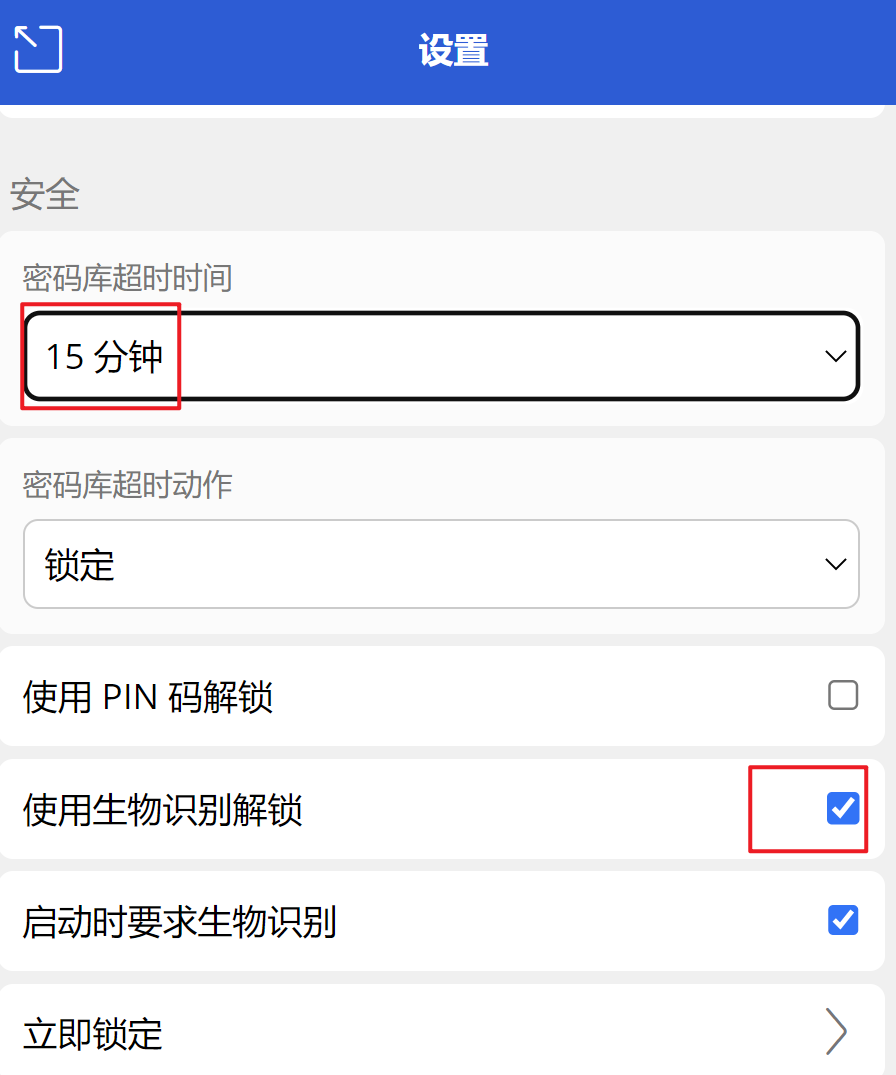
账户个性化设置
开启两步登录
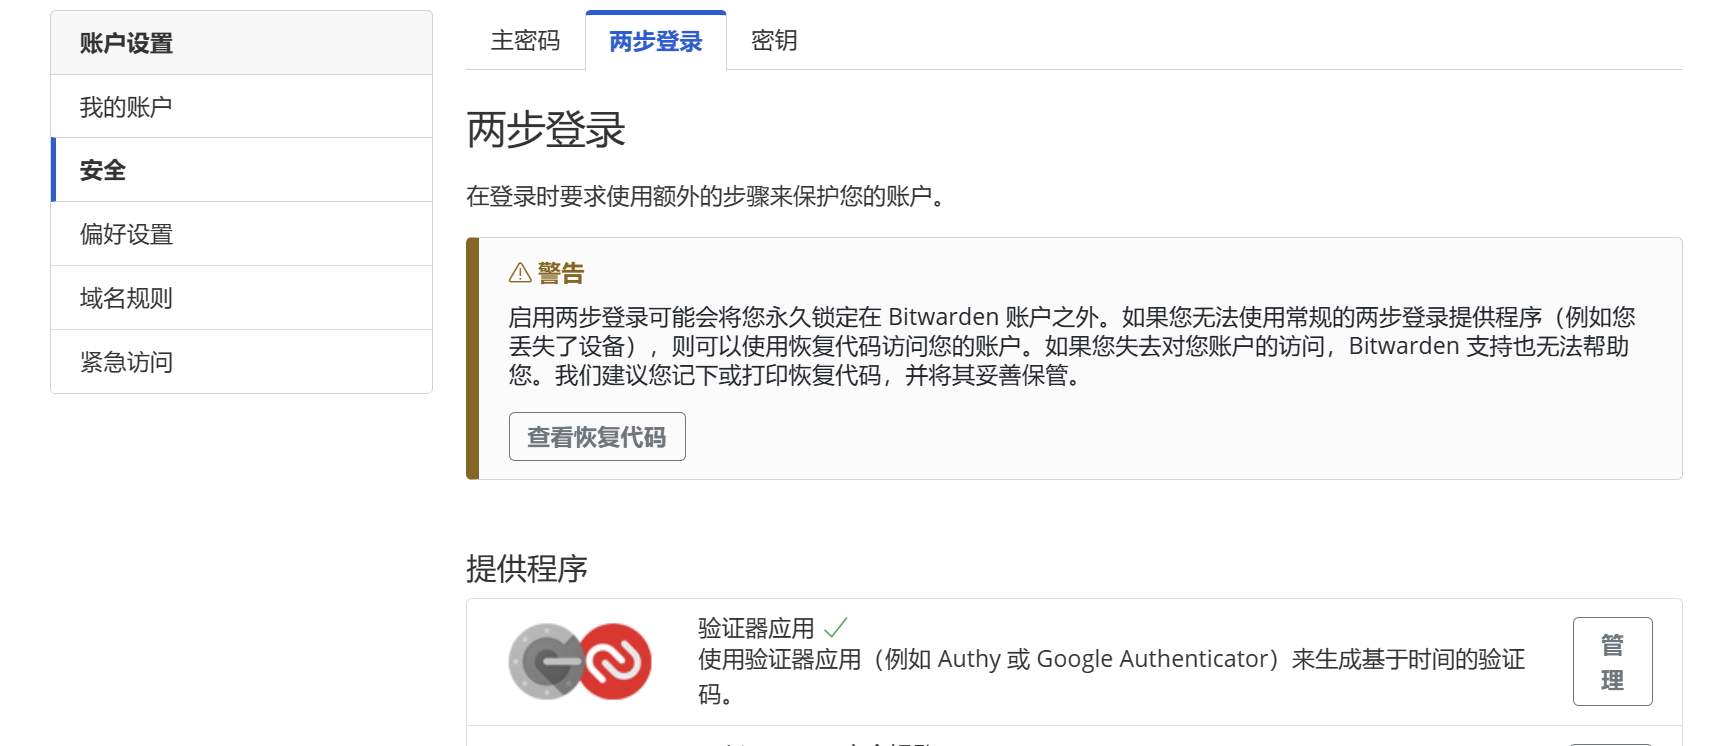
我选择的是 Google Authenticator,对于我来说,这个比较方便和安全。
注意
一定要找个地方把自己的
恢复代码 记录下来,保证自己账户的安全。登录浏览器插件、本地程序
注意
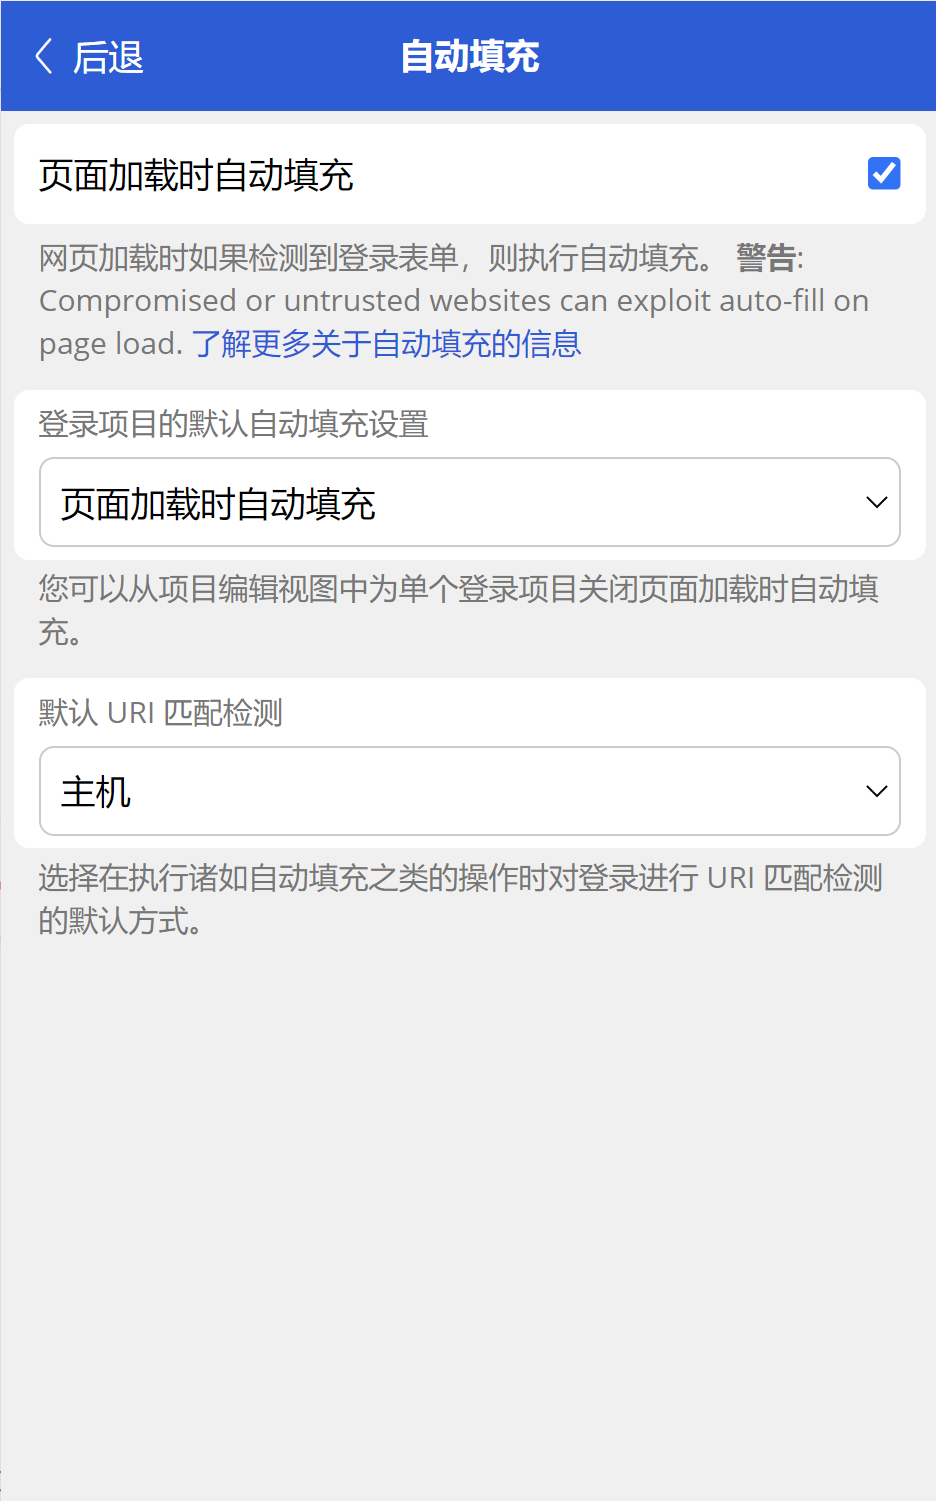
在登录的时候需要设置登录 Bitwarden 的网址,否则就是登录 Bitwarden 的官方的服务了。

个性化设置
数据库备份到 Dropbox
获取 refresh_token
- 前往 dropbox apps 注册一个 app;
https://www.dropbox.com/oauth2/authorize?client_id=<your_app_key>&token_access_type=offline&response_type=code去浏览器输入该网址,获取 app 的access_code,网址中需要替换<your_app_key>;- 输入已下命令获取得到
refresh_token1 2 3 4 5curl https://api.dropboxapi.com/oauth2/token \ -u '<your_app_key>:<your_app_secret>' \ -H 'Content-Type: application/x-www-form-urlencoded' \ --data-urlencode 'code=<your_app_access_code>' \ --data-urlencode 'grant_type=authorization_code'
python 脚本运行
- 安装 python 脚本的环境:
1pip install dropbox - 创建并运行该脚本:
1 2 3 4 5 6 7 8 9 10 11 12 13 14 15 16 17 18 19 20 21 22 23 24 25 26 27 28 29 30 31 32 33 34 35 36 37 38 39 40 41 42 43 44 45 46 47 48 49 50 51 52 53 54 55 56 57 58 59 60 61 62 63 64 65 66 67 68 69 70 71 72 73import shutil import dropbox import requests import os from dropbox.files import WriteMode from dropbox.exceptions import AuthError def refresh_dropbox_access_token(app_key, app_secret, refresh_token): # Function to refresh the access token using the provided app_key, app_secret, and refresh_token. url = "https://api.dropboxapi.com/oauth2/token" auth = (app_key, app_secret) data = { "refresh_token": refresh_token, "grant_type": "refresh_token" } response = requests.post(url, auth=auth, data=data) response_data = response.json() if "access_token" in response_data: return response_data["access_token"] else: raise ValueError("Failed to refresh access token.") def upload_folder_to_dropbox(folder_path, dropbox_target_path, app_key, app_secret, refresh_token): try: dropbox_access_token = refresh_dropbox_access_token(app_key, app_secret, refresh_token) dbx = dropbox.Dropbox(dropbox_access_token) # 获取本地文件夹名 folder_name = os.path.basename(folder_path) # 递归上传文件夹中的所有文件和子文件夹 for root, _, files in os.walk(folder_path): for file in files: local_file_path = os.path.join(root, file) relative_path = os.path.relpath(local_file_path, folder_path) dropbox_file_path = os.path.join(dropbox_target_path, folder_name, relative_path) # 以二进制模式打开文件并上传到 Dropbox with open(local_file_path, "rb") as f: try: dbx.files_upload(f.read(), dropbox_file_path, mode=dropbox.files.WriteMode.overwrite) except dropbox.exceptions.ApiError as e: if isinstance(e.error, dropbox.files.UploadWriteFailed) and e.error.is_conflict: # Handle file name conflict by renaming the file dropbox_file_path = os.path.join(dropbox_target_path, folder_name, "conflict_" + file) dbx.files_upload(f.read(), dropbox_file_path) print(f"{folder_name} 文件夹已成功上传到 Dropbox 中的 {dropbox_target_path}。") except AuthError as e: if e.error.is_expired_access_token(): # If the access token is expired, attempt to refresh it. new_access_token = refresh_dropbox_access_token(app_key, app_secret, refresh_token) print("Dropbox 已刷新API") # Retry the backup with the new access token. upload_folder_to_dropbox(folder_path, new_access_token, dropbox_target_path, app_key, app_secret, refresh_token) else: print("Dropbox授权失败,请检查您的API密钥。") if __name__ == "__main__": folder_path_to_upload = "<your_folder_path>" # 替换为要上传的文件夹路径 dropbox_target_path = "<your_dropbox_folder_path>" # 替换为您希望在 Dropbox 中保存文件夹的目标路径 app_key = "<your_app_key>" app_secret = "<your_app_secret>" refresh_token = "<your_refresh_token>" upload_folder_to_dropbox(folder_path_to_upload, dropbox_target_path, app_key, app_secret, refresh_token)
定时任务
| |
| |